Charmander - Free amigurumi pattern
|
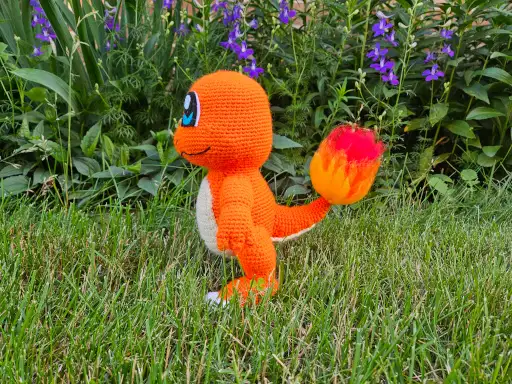
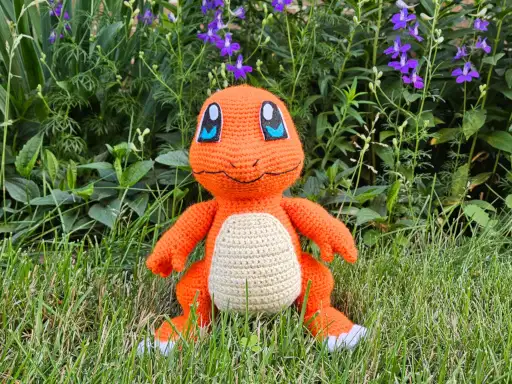
Charizard is icon when it comes to Pokémon and its fan base. Why wouldn't it be since it is a giant Dragon. Since dragons are not so cuddly though, here is Charizard's younger form Charmander. This version of the fiery lizard is so cute and huggable for that Pokémon fan in your life. Many gamers choose Charmander because of him being the fire type starter. I would have probably chosen him as well, but I didn't start playing until Gen 2. Here's a step by step guide about making your very own Charmander Pokémon amigurumi. Come join the fun and learn how to crochet your very own fire starter! If you make a Charmander, please @CrochetCacheCA on social media. I would love to see the results! |
Materials and Information
Yarns:
**All yarns are in Weight 4 - Medium / Worsted
- Orange - Bernat Premium
- Almond - Bernat Premium
- Cherry Red - Red Heart Super Saver
- White - Red Heart Soft
- Bright Yellow - Red Heart Super Saver
US Crochet Terms
Abbreviations:
- Rnd(s): Round(s)
- Row(s): Row(s)
- sc: Single Crochet
- dc: Double Crochet
- inv dec: Invisible decrease
- dec: Decrease
- inc: Increase
- dc inc: Increase but with double crochets
- blo: Back loop only.
- cc: Colour Change, followed by the colour
- sl st: Slip Stitch
Additional Materials:
- - Black - Aunt Lydia's Crochet Thread - Fashion 3 (1 Super Fine)
- - Blue, White and Black Felt
- - 3.5mm crochet hook
- - Bent Yarn needles
- - Scissors
Tips:
- - Keep track of beginning of rows by using a marker
- - 4.5mm crochet hook
- - Crochet this toy with tight stitches, helps not show the stuffing through
- - To keep details such as increases, make sure to add extra stuffing in these areas as you stuff them.
Use Policies:
You may not redistribute, sell or claim this pattern in it entirety, or in part of, as your own design/pattern
You are welcome to sell finish products made from this pattern, as long as you provide credit for the pattern as 'Pattern by Crochet Cache' if posted on a social platform other than Facebook, Instagram, Twitter. Else provide credit as 'Pattern by @CrochetCacheCA' on Instagram, Twitter or Facebook.
I am not responsible for any legal repercussions that may incur, this character is not licensed by me.
Charmander is property of the Pokemon franchise, I have no ownership of this character in any way. It is property of Nintendo.
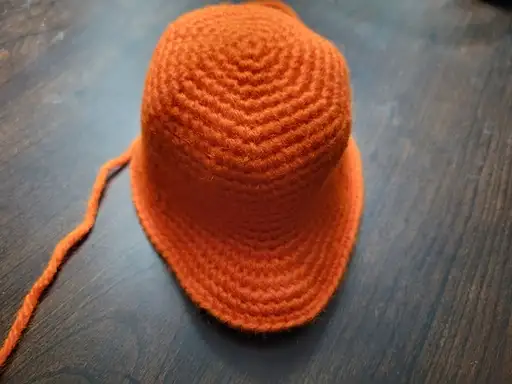
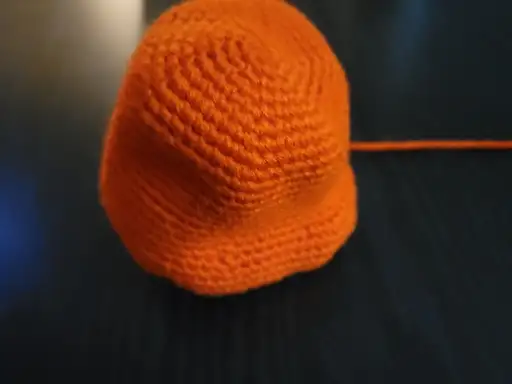
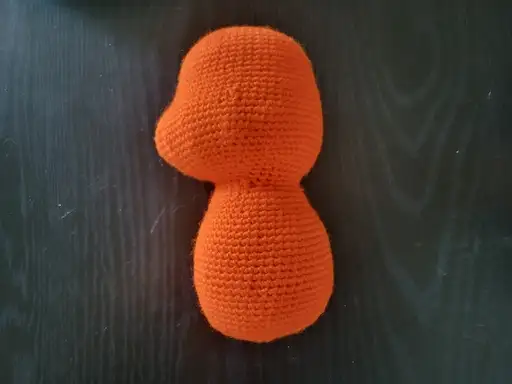
Head & Body
| Rnd 1 | Orange - 6sc in Magic Circle (6) |
| Rnd 2 | 6inc (12) |
| Rnd 3 | (1sc, inc) x 6 (18) |
| Rnd 4 | (2sc, inc) x 6 (24) |
| Rnd 5 | (3sc, inc) x 6 (30) |
| Rnd 6 | (4sc, inc) x 6 (36) |
| Rnd 7 | (5sc, inc) x 6 (42) |
| Rnd 8 | (6sc, inc) x 6 (48) |
| Rnd 9 | (7sc, inc) x 6 (54) |
| Rnds 10-14 | 54sc (54) |
| Rnd 15 | (8sc, inc) x 6 (60) |
| Rnds 16-17 | 60sc (60) |
| Rnd 18 | 27sc, 6inc, 27sc (66) |
| Rnd 19 | 30sc, 6inc, 30sc (72) |
| Rnd 20 | 72sc (72) |
| Rnd 21 | 15sc, 2inc, 4sc, inc, 5sc, inc, 4sc, inc, 6sc, inc, 4sc, inc, 5sc, inc, 4sc, 2inc, 15sc (82) |
| Rnds 22-23 | 82sc (82) |
| Rnd 24 | 34sc, inv dec, 8sc, inv dec, 34sc (80) |
| Rnd 25 | 20sc, 2inv dec, 5sc, inv dec, 3sc, inv dec, 3sc, inv dec, 3sc, inv dec, 3sc, inv dec, 5sc, 2inv dec, 20sc (71) |
| Rnd 26 | (4sc, inv dec) x 3, 5sc, inv dec, 9sc, inv dec, 10sc, inv dec, 5sc, (inv dec, 4sc) x3 (62) |
| Rnd 27 | 62sc (62) |
| Rnd 28 | 10sc, (inv dec, 5sc) x 3, (5sc, inv dec) x 3, 10sc (56) |
| Rnd 29 | 10sc, (inv dec, 4sc) x 3, (4sc, inv dec) x 3, 10sc (50) |
| Rnd 30 | 10sc, (inv dec, 3sc) x 3, (3sc, inv dec) x 3, 10sc (44) |
| Rnd 31 | inv dec, 8sc, (inv dec, 2sc) x 3, (2sc, inv dec) x 3, 8sc, inv dec (36) |
| Rnd 32 | (4sc, inv dec) x 6 (30) |
| Rnd 33 | 30sc (30) |
| Neck Bend Rnd 34 | 22sc, turn work skip a stitch 12sc, turn work skip a stitch 20sc around entire work (30) |
| Rnd 35 | (4sc, inc) x 6 (36) - Stuff head. |
| Rnd 36 | (5sc, inc) x 6 (42) |
| Rnds 37-38 | 42sc (42) |
| Rnd 39 | (6sc, inc) x 6 (48) |
| Rnds 40-41 | 48sc (48) |
| Rnd 42 | (7sc, inc) x 6 (54) |
| Rnds 43-57 | 54sc (54) |
| Rnd 58 | (7sc, inv dec) x 6 (48) |
| Rnd 59 | (6sc, inv dec) x 6 (42) |
| Rnd 60 | (5sc, inv dec) x 6 (36) |
| Rnd 61 | (4sc, inv dec) x 6 (30) |
| Rnd 62 | (3sc, inv dec) x 6 (24) - Stuff the body |
| Rnd 63 | (2sc, inv dec) x 6 (18) |
| Rnd 64 | (sc, inv dec) x 6 (12) |
| Rnd 65 | 6inv dec (6) - Stitch close using the front loops tie off and weave tail through body. |
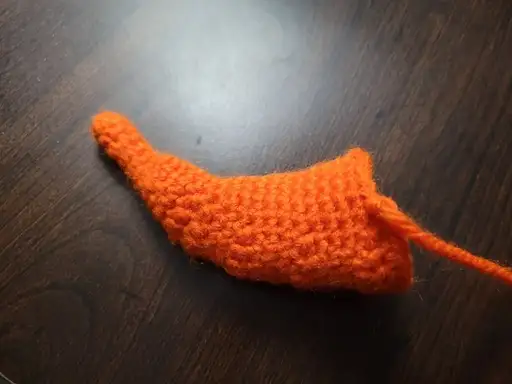
Tail
| Rnd 1 | Orange - 6sc in Magic Circle (6) |
| Rnds 2-6 | 6sc (6) |
| Rnd 7 | 4sc, 2inc (8) |
| Rnd 8 | 8sc (8) |
| Rnd 9 | (inc, 3sc) x 2 (10) |
| Rnd 10 | 10sc (10) |
| Rnd 11 | (inc, 4sc) x 2 (12) |
| Rnds 12-13 | 6sc, 6dc (12) |
| Rnd 14 | 12sc (12) |
| Rnd 15 | (inc, 2sc) x 4 (16) |
| Rnd 16 | 8sc, 8dc (16) |
| Rnd 17 | (7sc, inc) x 2 (18) |
| Rnds 18-19 | 18sc (18) |
| Rnd 20 | 9sc, 9dc (18) |
| Rnd 21 | (5sc, inc) x 3 (21) |
| Rnd 22 | 21sc (21) |
| Rnd 23 | (6sc, inc) x 3 (24) |
| Rnd 24 | 12sc, 12dc (24) |
| Rnd 25 | (4sc, inc) x 6 (30) - sl st, leave long tail to attach to the body. |
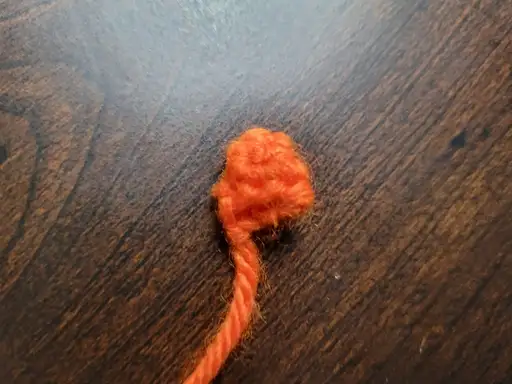
Fingers
**Make Six Orange**
| Rnd 1 | Orange - 4sc in Magic Circle (4) |
| Rnd 2 | 4sc (4) |
| Rnd 3 | (inc, sc) x 2 (6) - sl st leave tail. |
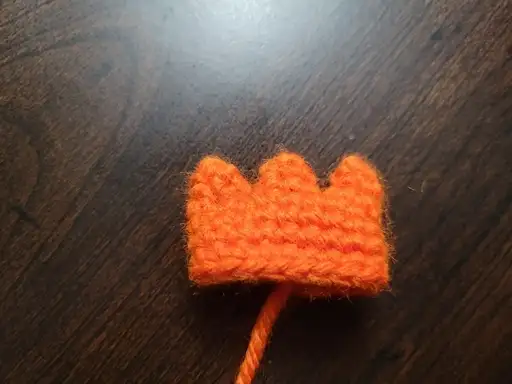
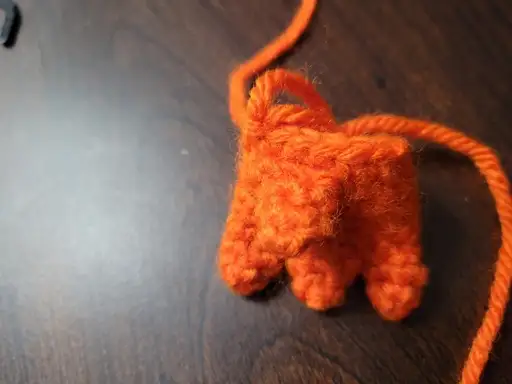
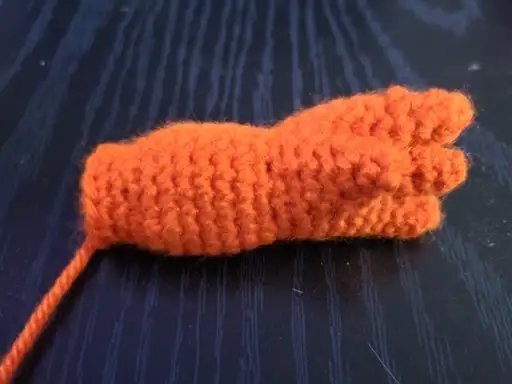
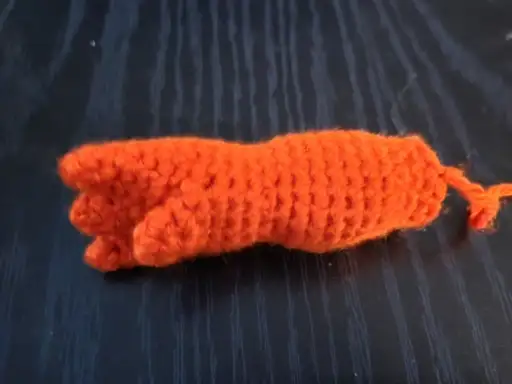
Right Hand / Arm
| Rnd 1 | Orange - 4sc in Magic Circle (4) |
| Rnd 2 | 4sc (4) |
| Rnd 3 | (inc, sc) x 2 (6) |
| Connect Fingers Rnd 4 | - Take 1 Finger and sc along 3 stitches on the finger connecting it. Take another finger and sc along 3 stitches connecting the third finger. 9sc around the other side of the fingers making them completely connected. (18) |
| Rnds 5-6 | 18sc (18) |
| Rnd 7 | 14sc, line up another finger with the tip of the finger pointing the same way as the other finder. This will be a thumb. 3sc through both the thumb and finger connecting them together, sc (18) |
| Rnd 8 | 14sc, 3 sc around the outside of the thumb, sc (18) |
| Rnds 9-11 | 18sc (18) |
| Rnd 12 | (sc, inv dec) x 6 (12) |
| Rnd 13 | (sc, inc) x 6 (18) |
| Rnds 14-18 | 18sc (18) |
| Rnd 19 | (sc, inv dec) x 6 (12) |
| Rnds 20-21 | 12sc (12) - sl st and leave long tail to attach to body. |
Left Hand / Arm
| Rnd 1 | Orange - 4sc in Magic Circle (4) |
| Rnd 2 | 4sc (4) |
| Rnd 3 | (inc, sc) x 2 (6) |
| Connect Fingers Rnd 4 | - Take 1 Finger and sc along 3 stitches on the finger connecting it. Take another finger and sc along 3 stitches connecting the third finger. 9sc around the other side of the fingers making them completely connected. (18) |
| Rnds 5-6 | 18sc (18) |
| Rnd 7 | 11sc, line up another finger with the tip of the finger pointing the same way as the other finder. This will be a thumb. 3sc through both the thumb and finger connecting them together, sc (18) |
| Rnd 8 | 11sc, 3 sc around the outside of the thumb, 4sc (18) |
| Rnds 9-11 | 18sc (18) |
| Rnd 12 | (sc, inv dec) x 6 (12) |
| Rnd 13 | (sc, inc) x 6 (18) |
| Rnds 14-18 | 18sc (18) |
| Rnd 19 | (sc, inv dec) x 6 (12) |
| Rnds 20-21 | 12sc (12) - sl st and leave long tail to attach to body. |

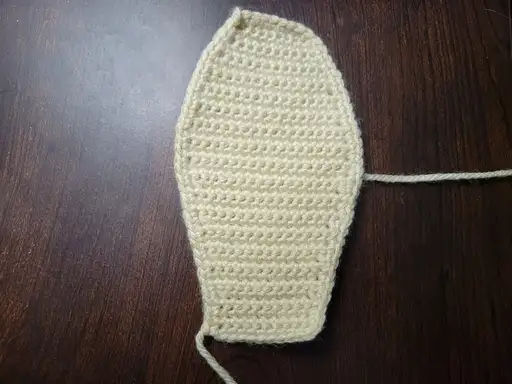
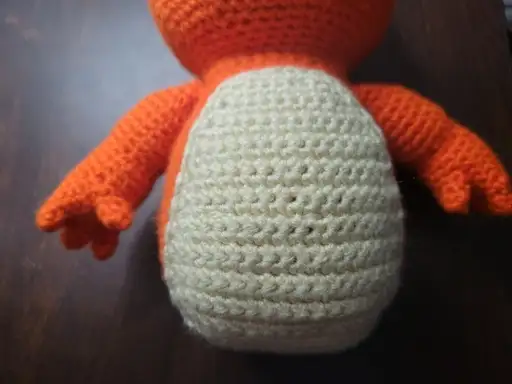
Stomach
| Almond - chain 9, skip stitch closest to the hook, 8sc, chain turn (8) | |
| Row 1 | inc, 6sc, inc, chain turn (10) |
| Row 2 | 10sc, chain turn (10) |
| Row 3 | inc, 8sc, inc, chain turn (12) |
| Row 4 | 12sc, chain turn (12) |
| Row 5 | inc, 10sc, inc, chain turn (14) |
| Rows 6-7 | 14sc, chain turn (14) |
| Row 8 | inc, 12sc, inc, chain turn (16) |
| Rows 9-11 | 16sc, chain turn (16) |
| Row 12 | inc, 14sc, inc, chain turn (18) |
| Rows 13-18 | 18sc, chain turn (18) |
| Row 19 | dec, 14sc, dec, chain turn (16) |
| Rows 20-22 | 16sc, chain turn (16) |
| Row 23 | dec, 12sc, dec, chain turn (14) |
| Rows 24-26 | 14sc, chain turn (14) |
| Row 27 | dec, 10sc, dec, chain turn (12) |
| Rows 28-30 | 12sc, chain turn (12) |
| Row 31 | dec, 8sc, dec, chain turn (10) |
| Rows 32-43 | 10sc, chain turn (14) - sc all around the ouside edge, sl st leave long tail to sew on to body. |
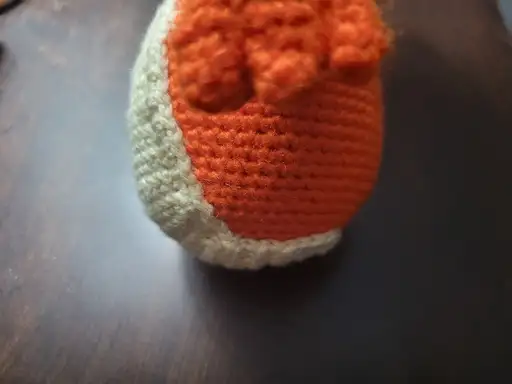
Stomach/Tail Extension
| Row 1 | Almond - chain 11, skip stitch closest to the hook, 10sc, chain turn (10) |
| Row 2 | dec, 6sc, dec, chain turn (8) |
| Row 3 | 8sc, chain turn (8) |
| Row 4 | dec, 4sc, dec, chain turn (6) |
| Rows 5-7 | 6sc, chain turn (6) |
| Row 8 | dec, 2sc, dec, chain turn (4) |
| Rows 9-11 | 4sc, chain turn (4) |
| Row 12 | 2dec, chain turn (2) |
| Row 13 | 2sc, chain turn (2) |
| Row 14 | dec - sc all around the ouside edge, sl st leave long tail to sew on to body & tail. |

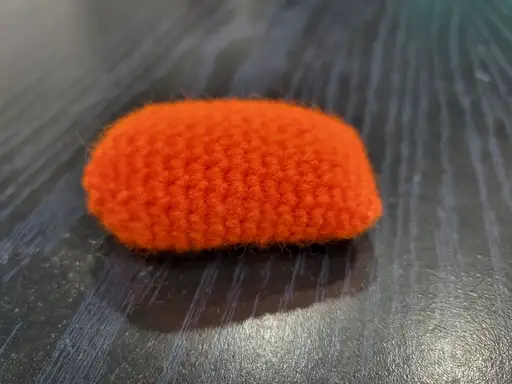
Feet
**Make Two**
| Orange - chain 9, skip stitch closest to the hook, 7sc, 3sc in same loop, continue around back of the chain, 6 sc, 3 sc in same loop (18) | |
| Rnds 1-3 | 18sc (18) |
| Rnd 4 | inc, 3sc, inc, 13sc (20) |
| Rnds 5-14 | 20sc (20) |
| Rnd 15 | (dec, 8sc) x 2 (18) |
| Rnd 16 | (sc, dec) x 6 (12) |
| Rnd 17 | 6dec (6) - stitch close the remaining six stitched and secure tail and feed through and snip extra. |
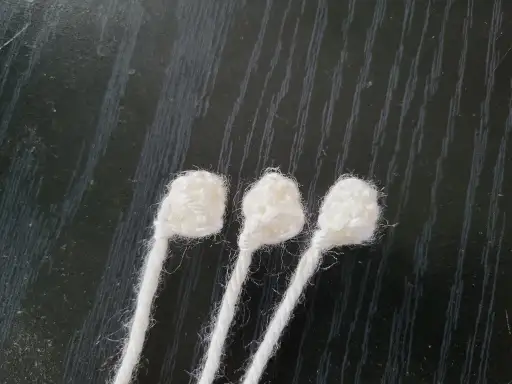
Toes
**Make Six**
| Rnd 1 | white - 4sc in Magic Circle (4) |
| Rnds 3-4 | 4sc (4) |
| - sl st leave long tail to attach to foot |
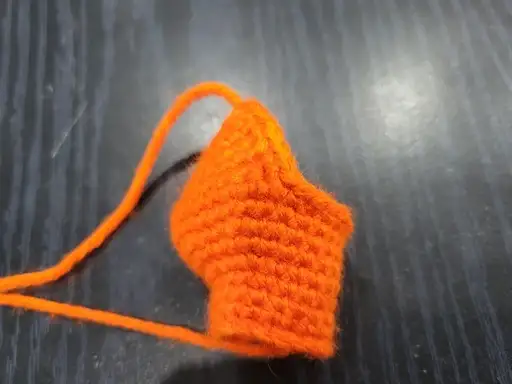
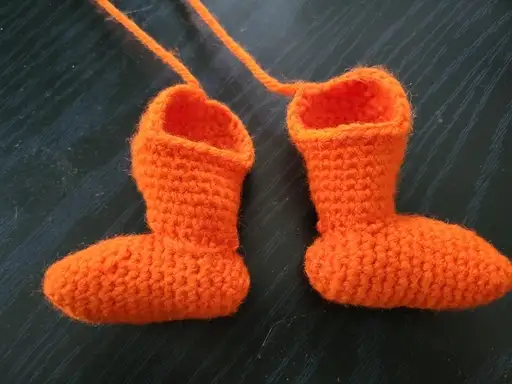
Legs
**Make Two**
| Orange - leaving a long starting string, chain 21, sc into first chain making a loop.(20) | |
| Rnds 1-2 | 20sc (20) |
| Rnd 3 | 8sc, 4inc, 8sc (24) |
| Rnd 4 | 8sc, inc, 2sc, 2inc, 2sc, inc, 8sc (28) |
| Rnd 5 | 28sc (28) |
| Row 1 | (Chain turn, only do this for left left), 20sc (20) |
| Row 2 | Chain turn, 4sc, dec, 2sc, 2dec, 2sc, dec, 4sc (16) |
| Row 3 | Chain turn, 16sc (16) |
| Row 4 | Chain turn, 2sc, dec, 2sc, 2dec, 2sc, dec, 2sc (12) |
| Row 5 | Chain turn, 12sc (12) |
| Row 6 | Chain turn, dec, 3sc, dec, 3sc, dec (9) |
| Row 7 | Chain turn, dec, 2sc, dec, sc, dec (6) |
| Row 8 | Chain turn, 3dec (3) - sc all around opening. Leave long tail to attach to body. sl st. |
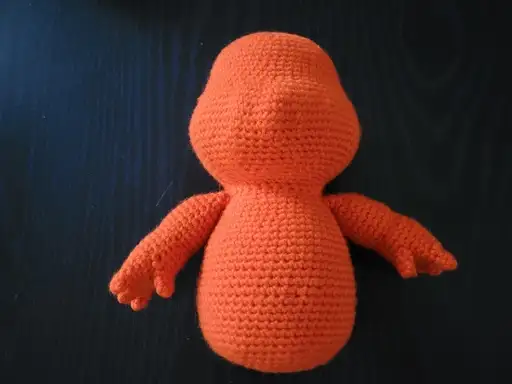
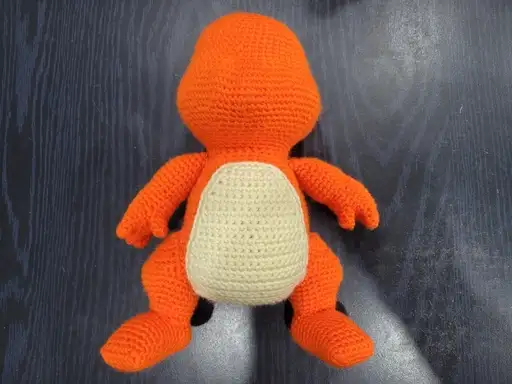
Assembly
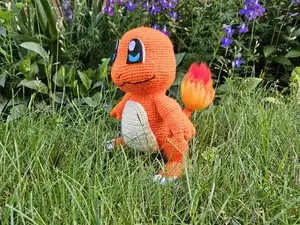
Charmander really starts to take shape when assembling him. Also when you can start really appreciating all the hard work you have put into making a Charmander for yourself or loved one. He is starting Pokémon that is a fan favourite and usually one of the most valued cards in the card sets.
- Attach the left and right arm to its appropriate sides. both just a little lower then the neck line. If you want his arms more forward facing, just adjust the angle you attach them.
- Align the stomach under the neck, with the more rounded end being towards his head. The more stretched end is towards his bottom. This is the end you will also add the Tail/Stomach extension to.
- You take the legs and attach them so that the small opening is to the top of a foot. Make sure the larger opening is the inside of the foot align where a ankle would be. This is to keep his feet straight, once attached to the body.
- Align Charmander's legs to the edge of the stomach to attach them. The hard part is keeping it aligned while stitching them on. I suggest using pins to accomplish this.
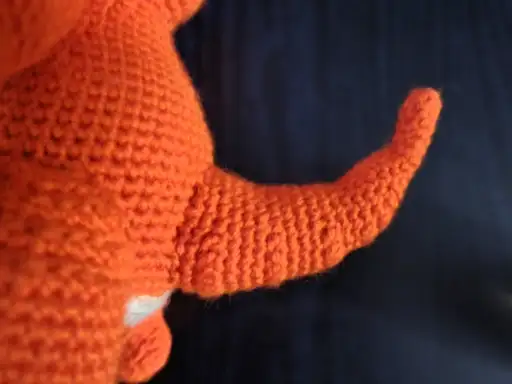
- Align the tail to the bottom of his body at the back. Just above the end of the stomach. Make sure to keep the tip of the tail pointing up or else your tail will be tilted.
- Attach the tail/stomach extension align the base of the extension to the bottom of the stomach to overlap the tail.

- Attach three toes at the end of each foot try to align them so they are even. I didn't put any stuffing in, but if you would like to go for it.

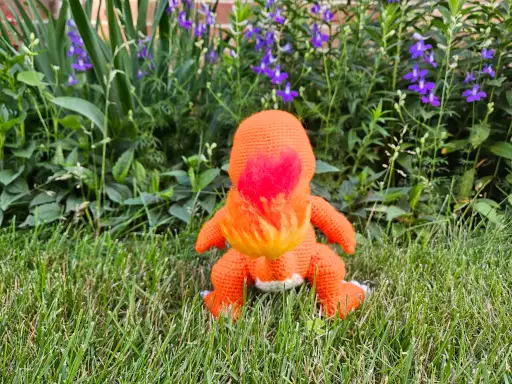
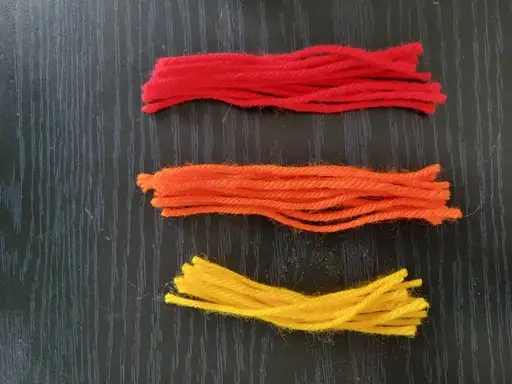
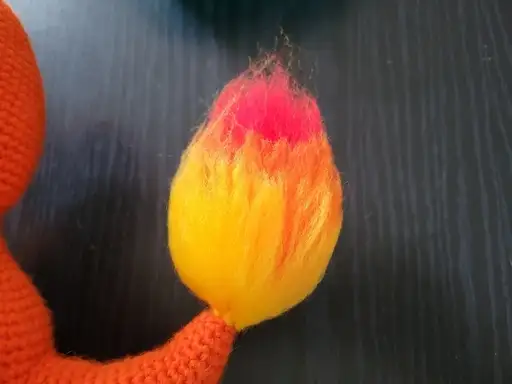
- Cut about 10 pieces of red yarn about 5 inches in length. Cut yellow and orange, 16 pieces about 4 inches in length
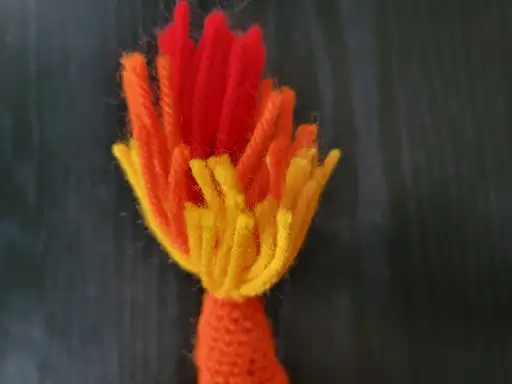
- Fold each string in half. Using your crochet hook, put the hook through the holes at the end of the tail starting with red at the tip, put the bent pieces through the tail and then feed the cut end through the loop of the string and pull tight. Do this for each colour, working from red, orange then yellow from the tip to down the tail. You many need more or less piece of each color depending.
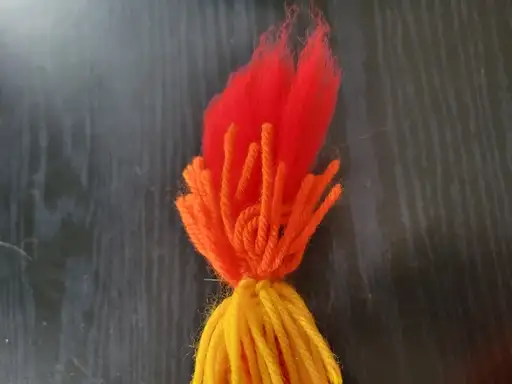
- Take a pet wire brush and separate each color and brush until the yarn becomes fluffy. You will loose some yarn to this but it is ok. Do this for each color, try not to hit the orange of his tail.
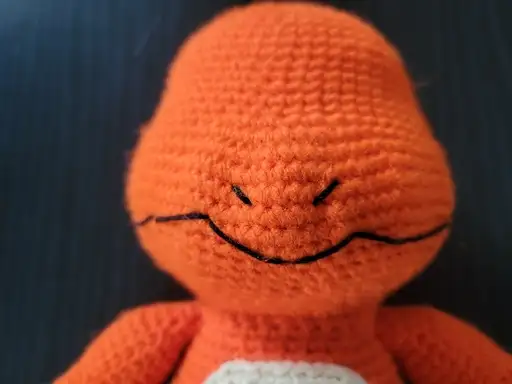
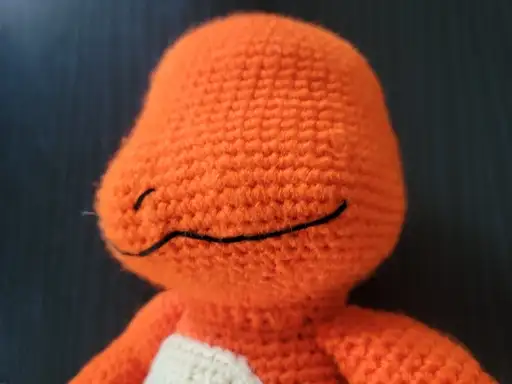
- Next using the crochet thread, is to stitch on a mouth. I had to play with mine to get it the way I liked it. I have also seen people stitch on some white teeth to give it just a bit more detail.
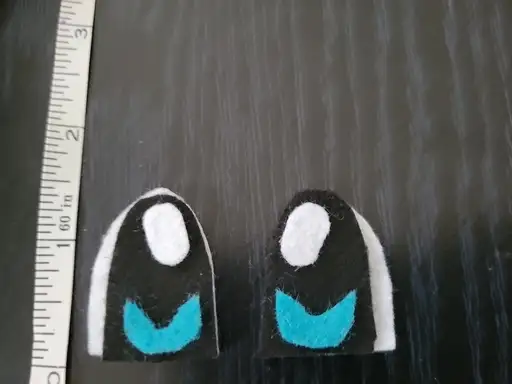
- I used felt for my eyes, but if you have a different way go for it, I would like to see other techniques. The image has the tape measuring tape to try and give an idea how large to make them.I just use hot glue to attach them to his head.
YOUR DONE!
Conclusion
You have now have a finished fire starter Pokemon, Charmander! Hope you found the instructions not to complicated. If you have any question please reach out. I cannot wait to see your results please tag me on social media.
This project took me way to long to make and get posted. I kept not seeing the finished picture, and kept delaying. I also redone the legs 3 times or so, until I came up with the final version. I hope you have fun with this pattern, even if it was for your self or the Pokefan in your life.